GISBox easily realizes the conversion of Geotiff to Cesium image tiles


In today’s rapidly evolving field of Geographic Information Systems (GIS), the processing and visualization of geographic data play an increasingly crucial role across various industries. Especially in the realm of 3D visualization, the conversion and processing of data formats are particularly critical. GeoTIFF, as a widely used raster data format, is commonly employed to store elevation data, satellite imagery, and more. Meanwhile, Cesium, a powerful open-source 3D visualization engine, is frequently used for the presentation of geospatial data. However, since Cesium’s Terrain engine does not directly support the GeoTIFF format, we need to leverage third-party tools to facilitate data format conversion and loading.
GISBox, as a professional GIS toolbox, offers an efficient solution by converting GeoTIFF files into tile formats recognizable by Cesium, thereby enabling the display of GeoTIFF data in Cesium’s 3D visualization scenarios. This article will provide you with a detailed guide on how to utilize GISBox to complete this conversion process.
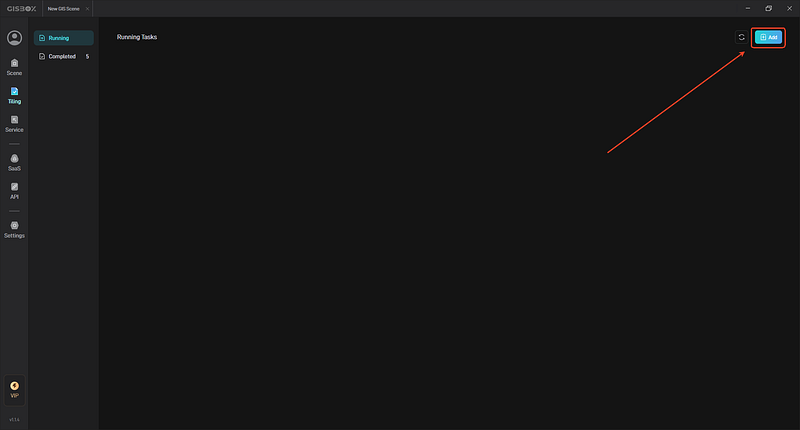
1. Launch and Task Creation
First, open the GISBox software and navigate to the main interface. Locate and switch to the “Tiles” function module in the navigation bar, then click the “Add” button in the upper right corner. This step will initiate a new tiling task, allowing you to perform subsequent GeoTIFF data conversion operations within this independent task space for easier management and adjustment of each step’s configuration.
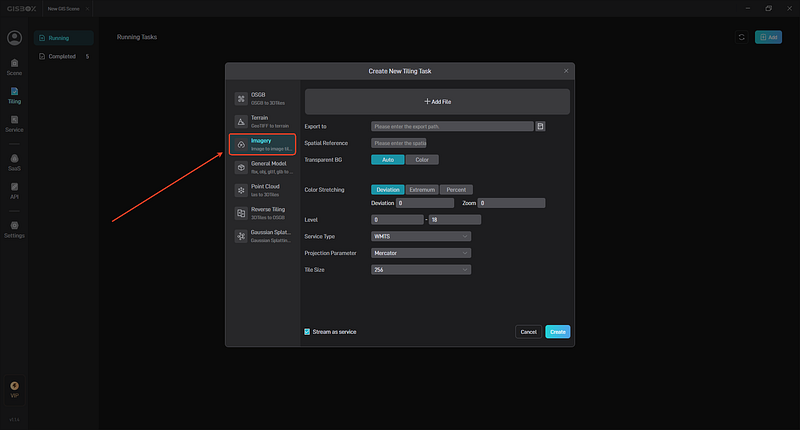
2. Target Type Selection
In the window for creating a new tiling task, you will see multiple tile type options. Select “Image Tile” as the target type to convert GeoTIFF data into an image tile format suitable for Cesium.
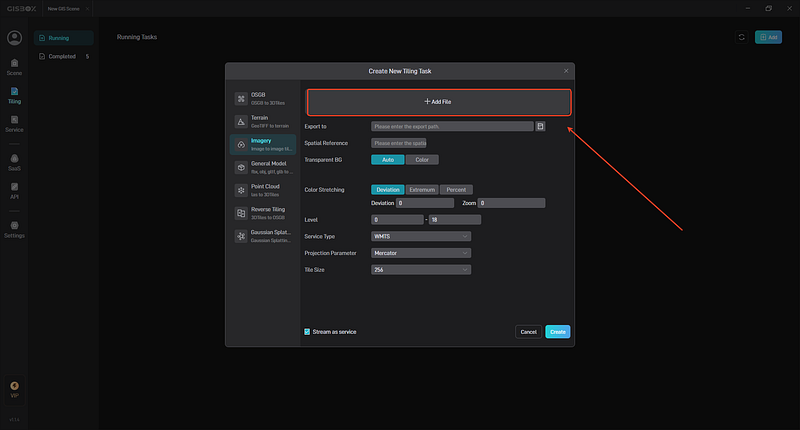
3. File Import
Click the “+ Add File” button at the top of the task window to select the GeoTIFF file you need to convert from your local file system. Whether it’s elevation data or imagery data, it can be imported into GISBox through this operation. After selecting the file, click the button to import it into the tiling task, preparing it for the next step of processing.
4. Output Directory Setup
Next, click the folder icon on the right side of the task window to set the output directory for the converted tile files. It is recommended to choose a folder path with sufficient storage space and easy accessibility for subsequent use. After setting the output directory, the system will save the conversion results to this path, ensuring file security and ease of access.

5. Tile Processing
After completing the above settings, click the “OK” button, and GISBox will automatically begin the tile processing of the imported GeoTIFF file. You can view the processing progress in real-time, with the system displaying the execution status of the current task through a progress bar. The tiling time depends on the file size and the computer’s processing capabilities; larger files or lower-performance computers may require more time. Please be patient until the tiling task is completed.

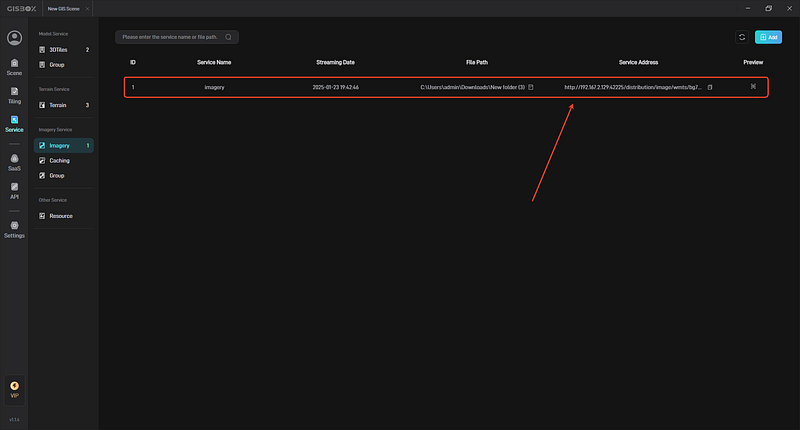
6. View Service Address
Once the tiling task is finished, you can switch to the “Distribution” module in GISBox. In this module, you will see the service address for the completed tiling task. Click to copy this service address, as this link is the reference address for your converted GeoTIFF data on the network. Next, you only need to configure this service address into Cesium’s imageryProvider settings to load and display the imagery data in the 3D scene built by Cesium.
By following this approach, GeoTIFF data can be seamlessly integrated into Cesium’s 3D visualization environment, significantly enhancing data manipulability and visualization effects. Whether you are engaged in urban modeling, geographic analysis, or satellite imagery presentation, GISBox provides you with efficient and convenient support.
Summary
Through the aforementioned steps, you can easily convert GeoTIFF files into Cesium image tile formats. GISBox not only simplifies this conversion process but also provides efficient service and tool support, making the originally complex geographic data conversion quick and simple.