GISBox: GIS Image Tiling and Distribution for Professional Map Services
GIS imagery tiling refers to the process of dividing large-scale geographic image data into multiple smaller pieces to facilitate more efficient storage, processing, and display. This technology is widely used in map services, Geographic Information Systems (GIS), 3D visualization, and other fields. Especially when displaying large-scale geographic data, tiling can significantly improve rendering speed and user experience. Currently, many products that provide GIS image tiling services are fee-based, and the process can be quite cumbersome.
GISBox is a GIS toolbox capable of slicing GIS images, terrain, and oblique photography, as well as converting formats and publishing services. It not only supports one-stop conversion of multiple GIS file formats but also real-time editing of oblique photography and completely free publication of image, terrain, and oblique photography services. Now, let’s take a look at how to use GISBox for GIS image tiling and distribution.
- Imagery Tiling
Open the GISBox software and click the “New” button in the upper right corner to create a tiling task.
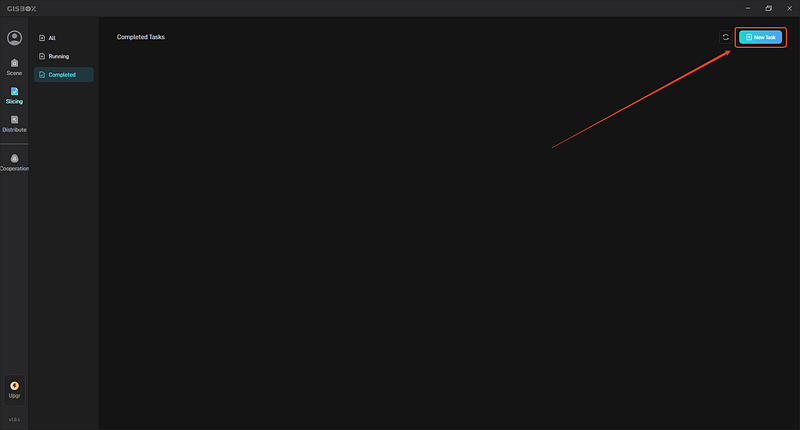
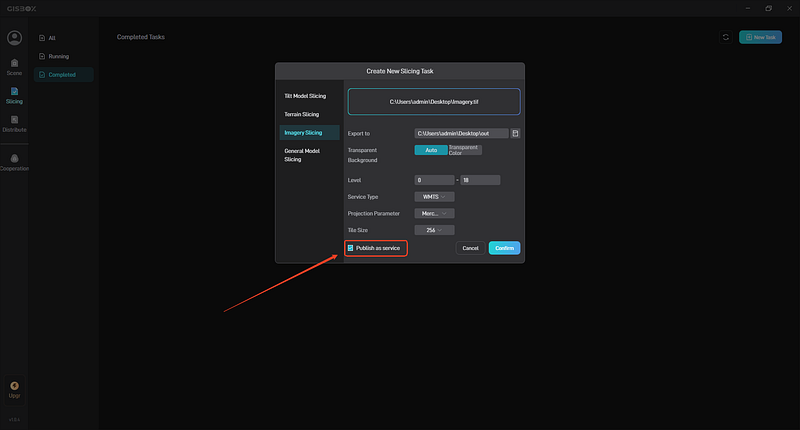
Click on the left to switch to “Imagery Tiling,” then click the “+” icon above “Add File” to add our local files.

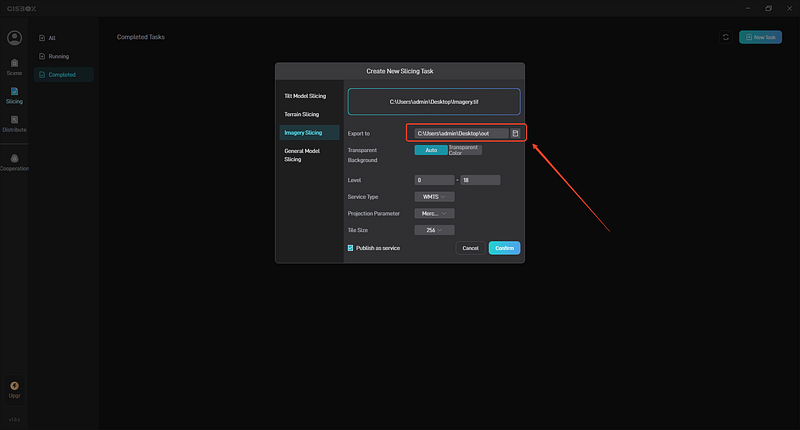
After adding the files, an address will be automatically generated in “Export To,” located in the same directory as the added files. Click the folder icon on the right to set the file export path. There are no special requirements for the export path; it is usually saved in a folder. The save path should preferably be empty; otherwise, a prompt will appear.
Below are some settings for image tiling, with special attention needed for the “Level” setting, which affects tiling speed. If you find that the required time is too long during the tiling process, you can adjust it downward appropriately to shorten the tiling time.
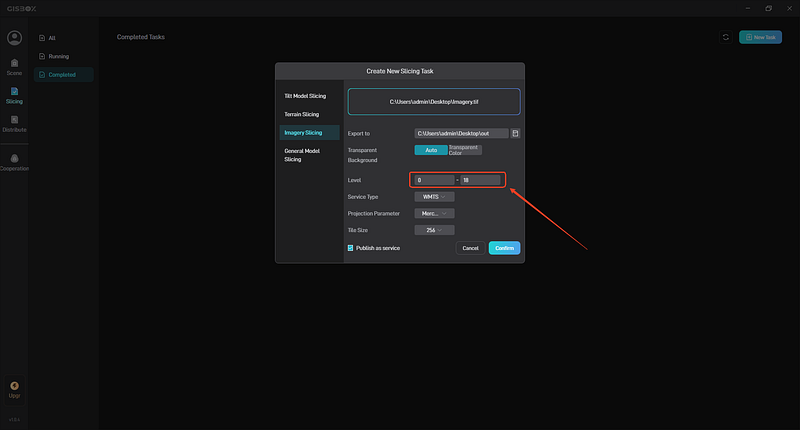
Finally, there is an option to “Publish as Service Simultaneously.” If checked, a distribution service will be automatically generated upon completion of the tiling. If not checked, you will need to manually add it in the distribution.
2. Service Distribution
In “Distribution,” you can see the completed tiling services. Click the button next to “File Path” to view the locally sliced files.
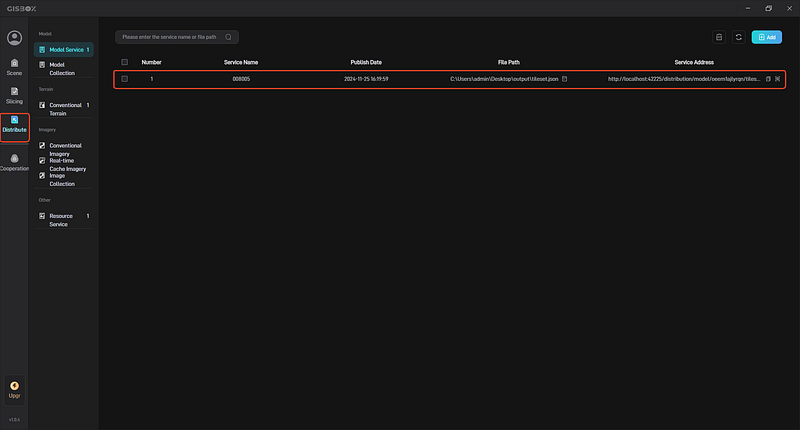
On the right are the generated service addresses. Click the “eye” button on the right to view the sliced images in the browser.
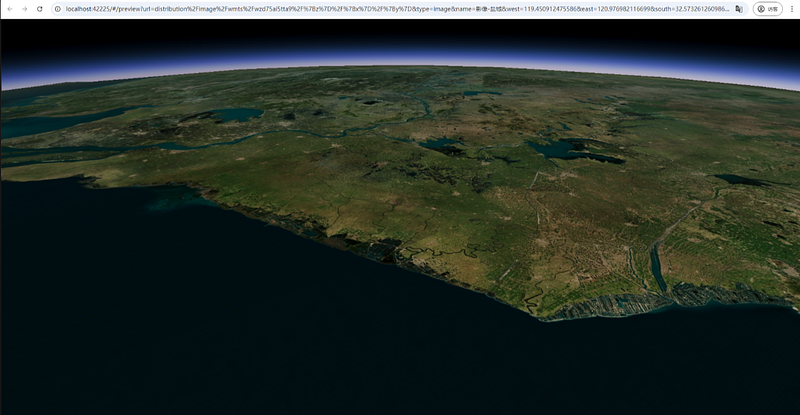
The GIS images opened in the browser are shown in the figure below:
